


Adding directly synced accounts
Android calendar data
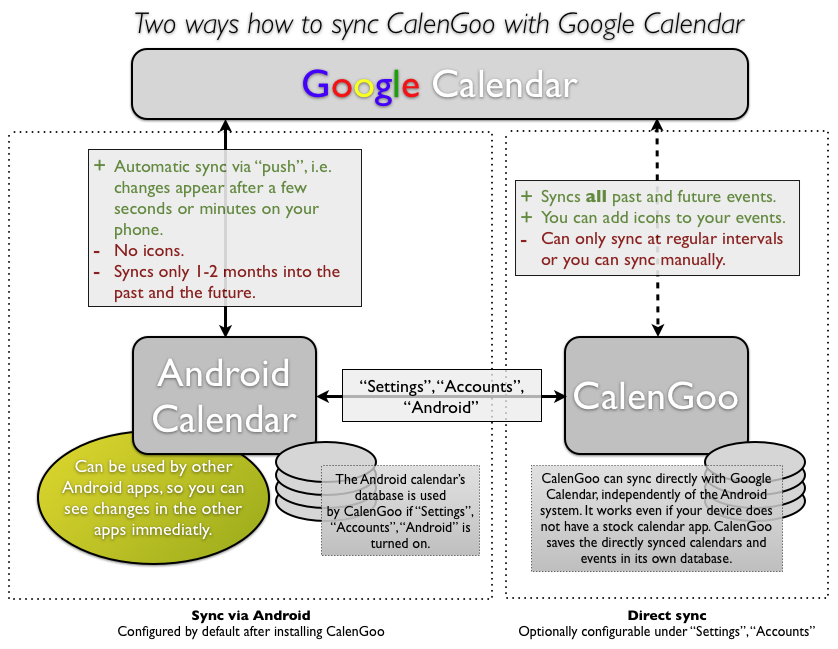
After the first installation CalenGoo will automatically use the data of the built-in Android calendar (i.e. "Settings > Accounts > Android" is checked in CalenGoo). This way you can immediately start using CalenGoo. Additionally if you make changes they will immediately appear in all other apps on your Android phone that are also accessing the built-in Android calendar. And the Android calendar can sync via push, i.e. changes that are entered on the Google Calendar website (or synced to the website) will usually automatically appear on the phone a few seconds or minutes later. However the disadvantage is that the Android calendar only keeps events up to 2-3 months into the past available (except if you use a trick). Additionally it doesn’t support assigning icons to events.Direct sync with Google Calendar
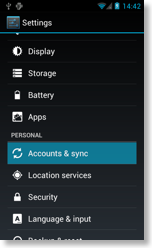
To configure CalenGoo to sync your Google Calendar directly, you have to add your account under “Settings > Accounts” in CalenGoo. Just start CalenGoo, press the menu button and choose "Settings > Accounts". Then tap "Add account > Google".
Additionally you can configure the sync interval after you have entered a directly synced Google account, please see below.
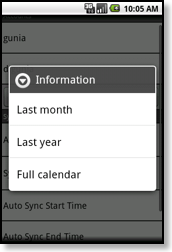
After adding a new account you will be asked if you would like to download the last month, last year or all past events of your calendar. Future events will always be downloaded.
If you add the same account that your Android phone already syncs with, you will see duplicates afterward. You have to tap “Settings > Accounts” and uncheck “Android” in CalenGoo to fix it. You can find more information about fixing duplicates here: Duplicates
Reset calendars
If you are syncing directly with Google Calendar and something is wrong i.e. CalenGoo is no longer in sync with Google Calendar, you can use “Settings > Reset calendars” to erase all events and calendars and re-download everything from Google during the next sync. Just tap “Settings > Reset calendars” and afterward start “Sync” from the menu of the calendar view.Manual/automatic sync
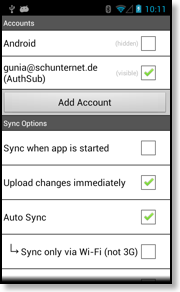
In CalenGoo you can configure how changes are uploaded and downloaded. If "Upload changes immediately" is turned on, each event that you change in CalenGoo will be uploaded immediately. It is recommended to keep this switch turned on.For downloading changes from Google Calendar CalenGoo can sync at a regular interval and/or via push syncing. You should usually turn "Quick sync" and "Push sync" on:
- Quick sync: Without quick sync CalenGoo will have to check each of your calendars for changes, which can take a while if you have many calendars. Using quick sync it uses a server and Google Calendar’s push notifications to immediately know which calendars have changed and sync only these calendars.
- Push sync: If push sync is turned on, CalenGoo will automatically sync when something changes in your Google Calendar. I.e. Google will send a push notification via a CalenGoo server to your phone and trigger a sync. The CalenGoo server does not have access to your calendars or events, it just received the information that a certain "channel" (which can be a calendar or a list of calendars) has changed. That information is then forwarded to CalenGoo in your phone which knows what is means with the channel and can sync the appropriate calendar.
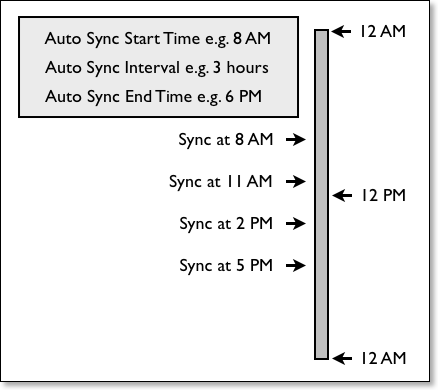
In addition you can configure an "Auto Sync Interval". This can be useful if push sync fails. I.e. you should configure a long auto sync interval of e.g. six hours. Then CalenGoo will sync at least every six hours but it will automatically sync more often if changes are detected in your calendar due to push sync.
With “Auto Sync Start Time” and “Auto Sync End Time” you can define a time range when the device should sync, e.g. the time when you are awake. This way it won’t sync at night and won’t drain the battery. With “Auto Sync Interval” you can specify the time between two syncs. Please see this diagram:
Additionally you can turn “Sync on Wi-Fi connect” on to sync every time you connect to a Wi-Fi network. But this might be very often because most phones disconnect after a while from the Wi-Fi network when the screen is turned off. That means when you turn it on, it will re-connect to the Wi-Fi network and then also run the sync.
Un-synced events
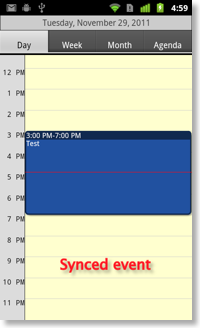
When you change an event or add a new one, CalenGoo will try to upload it immediately (if “Settings > Accounts > Upload changes immediately” is turned on). If this fails, it will display the event with a transparent background as a warning that this event hasn’t been synced yet. It will try to sync it again during the normal sync.
Local calendars
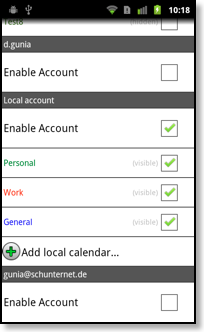
In addition to syncing with Google Calendar, you can have local calendars in CalenGoo. Just enable them under “Settings > Display and Use > General > Allow local calendars”. Afterward you can add local calendars under “Settings > Visibility/Download” and assign colors to them by tapping their names: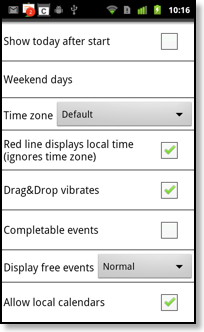

You should certainly be aware the the data of these local calendars is only available in CalenGoo and isn’t synced with any servers, so you won’t have a backup of this data. But you can turn “Settings > Display and Use > Maintenance > Move DB to SD card” on to save CalenGoo’s database (which contains these local calendars) to your SD card. From there you can backup it or use an external program to export your calendars and events from that file if something is wrong with your phone: Recover
Disabling Android’s calendar sync
If you are syncing CalenGoo directly with Google and don’t need or want the Android calendar to also sync with Google, you can turn that off. There is usually a home screen widget that controls if your phone syncs with Google at all. You can either turn this off (but then also contacts and emails won’t be synced in the background any more) or you can leave it turned on and only turn "Sync Calendar" off in the "Settings" app.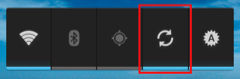

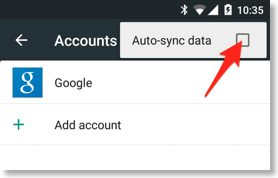
In Android 5 you have to start the "Settings" app, tap "Accounts" and then tap the menu button in the upper right corner to turn the automatic sync on or off:
Hybrid sync mode
If you would like to combine the advantages of both sync methods, you can use the hybrid sync mode. It appears as an option "Hybrid syncing..." under "Settings", "Accounts" in CalenGoo if you have an active Android account and an active Google account. When turned on, it will display events from the Android calendar for the current +/- 1 months (which has the advantages that changes are synced via push, i.e. changed from Google Calendar will usually appear automatically after a few minutes in CalenGoo) while events that are farther in the past or the future are displayed from the Google account, which can contain all your past and future events without the limitation of the Android calendar (which syncs only a few months of the past and future events).Under "Settings", "Default calendar" you should choose one of your Android calendars so that you see newly entered events immediately (at least for the +/-1 months time range).