


Creating backups
There are several ways how to create a backup:Google Calendar Backup
Using the Google Calendar website: This is the easiest way to create a backup of all your personal events in Google Calendar:
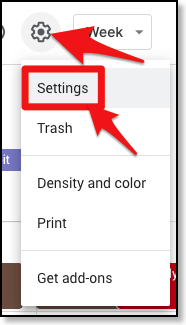
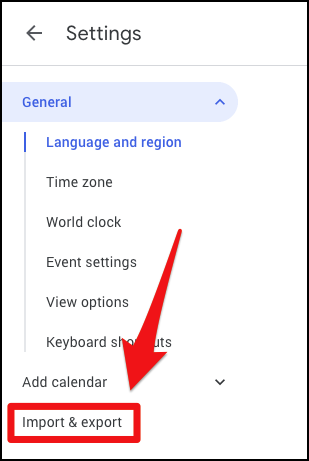
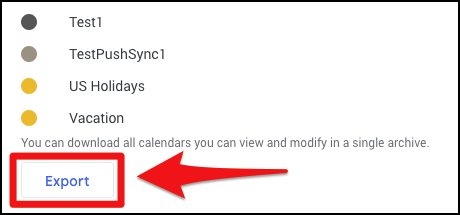
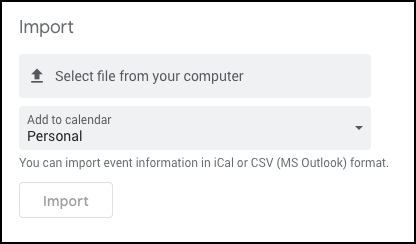
On the Google Calendar website, http://calendar.google.com, you can download a ZIP file that contains one ICS file per calendar (of your personal calendars under “My calendars” but not your shared calendars under “Other calendars”): Click “Settings > Import & export > Export > Export":

These ICS files (i.e. you have to unzip the ZIP file) can be imported into another Google Calendar account with “Settings > Import & export > Import > Import”:
These ICS files (i.e. you have to unzip the ZIP file) can be imported into another Google Calendar account with “Settings > Import & export > Import > Import”:
Using CalenGoo’s ICS export function
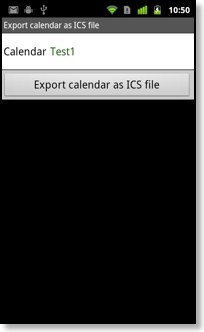
Under “Settings > Display and Use > Maintenance > Export calendar as ICS file” you can find an ICS export function in CalenGoo. There you can select a single calendar and it will be written as an ICS file to your SD card. This function can be useful to backup an existing calendar or to transfer the contents of a local calendar or an Android calendar to Google Calendar.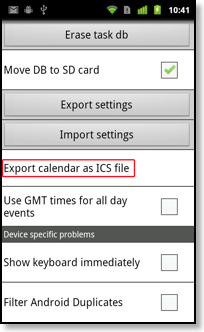
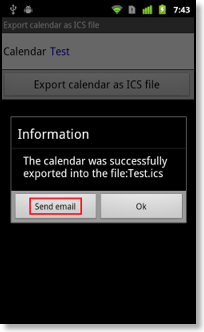
This ICS file can be imported into Google Calendar or other calendar applications. To import them into Google Calendar, you have to first transfer the file onto your computer. This easiest way is to just email yourself the file after it has been created:
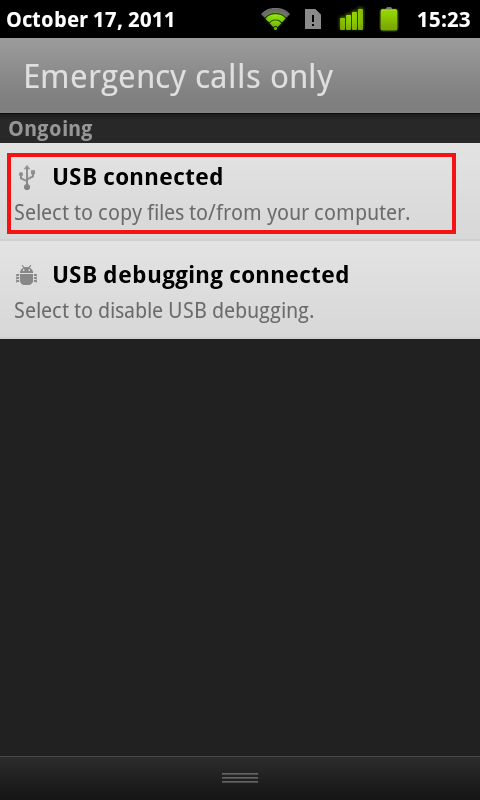
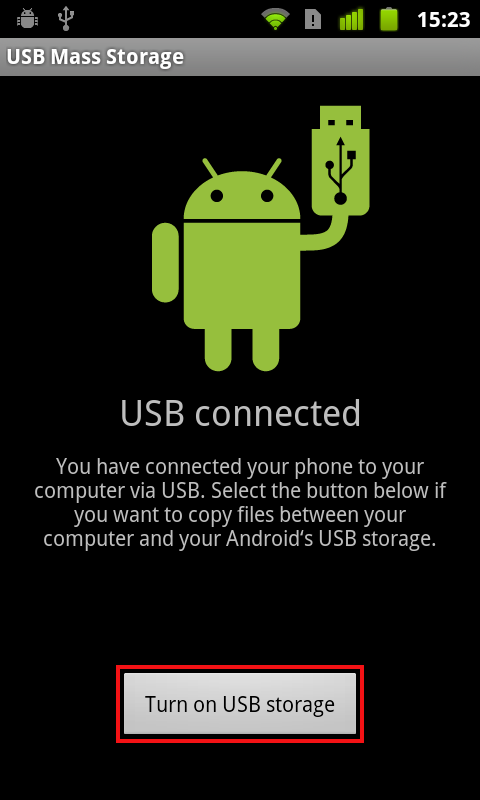
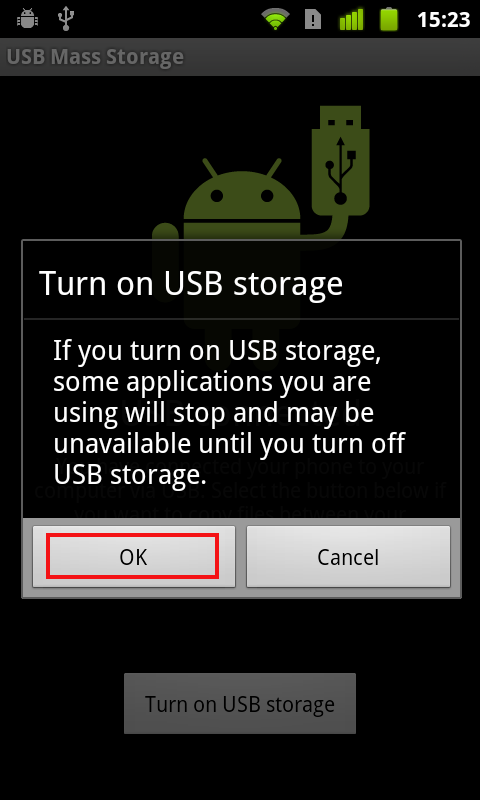
Another option is to transfer it via USB. Just connect your phone via USB to your computer and search for the ICS file that you created. The phone should appear as a new drive on your computer. If it doesn’t appear, you may have to turn it on first: Do a swipe gesture from the top to the bottom of the screen of your Android phone to open the status bar. Then tap “USB connected > Turn on USB storage > OK”:
After you have transferred the file to your computer, sign in to Google Calendar and click the gear icon in the upper right corner, “Settings > Import & Export > Import”. If necessary you can also create a new calendar before importing the file:
Using CalenGoo’s ICS import function
Currently CalenGoo can import ICS files only into local CalenGoo calendars. To import ICS files into Google Calendar use the Google Calendar website as explained above.To import an ICS file into a local calendar you have to create one or more local calendars first: Turn “Settings > Display and Use > General > Allow local calendars” on and then add one or more local calendars under “Settings > Visibility/Download”. Afterward you will get a new menu “Settings > Display and Use > Maintenance > Import calendar from ICS file”. Tap it to get this screen:

There you can choose which file to import into which local calendar. You can also erase that calendar before importing the ICS file.
Using CalenGoo’s database
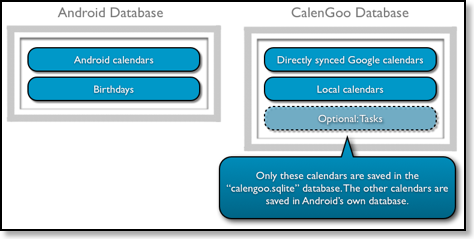
CalenGoo’s database contains all of CalenGoo’s settings, your tasks and if you sync CalenGoo directly with Google calendar it contains also your directly synced events. By turning “Settings”, “Display and Use”, “Maintenance”, “Move DB to SD card” on, this database is moved to your SD card where you can see and backup it. The filename is “calengoo.sqlite”. You can either backup it by copying it to your PC or you could use an app that creates backups of this file at a regular interval. CalenGoo also contains an own function to create automatic backups of this database, please see Automatic backups.There is also a program to export your events from this database without CalenGoo. You can find that program here: Recover
Creating a backup of the settings
If you only want to backup/save CalenGoo’s settings, you can do this with “Settings”, “Display and Use”, “Maintenance”, “Export Settings”: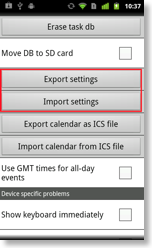
This will write your settings to your SD card into a file “calengoosettings.ini”. With “Import settings” you can load the settings at a later time.